Table of Contents
A bootable USB is a USB flash drive that has been specially prepared to install or repair an operating system such as Windows, Linux, Ubuntu and many others. It is especially useful for computers that cannot boot from a CD or DVD drive.
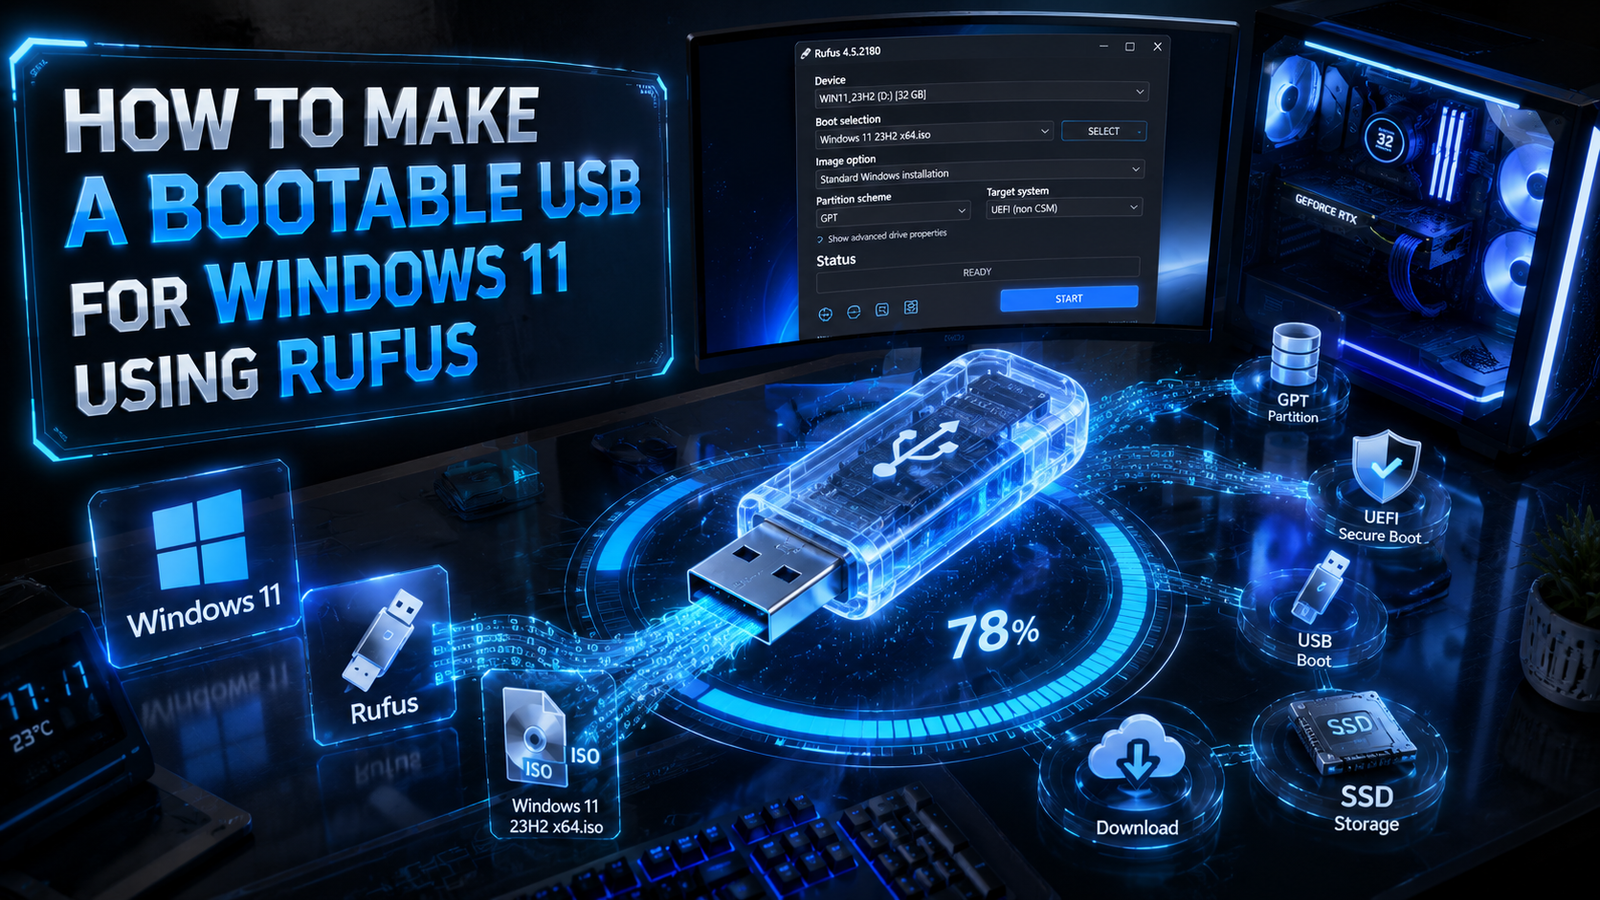
Rufus is one of the most popular tools for creating bootable USB drives. It allows you to burn an ISO file (disk image) to a USB drive and make it bootable within a few minutes. Rufus is free, lightweight, portable, and easy to use, making it an excellent choice for beginners and advanced users alike.
Requirements
- A Windows ISO file (download link mentioned below).
- An empty or formatted USB flash drive (8 GB or larger).
- Rufus downloaded on your Windows PC.
- Administrator privileges on your computer.
Getting Things Ready
Step 1: Download Rufus
- Go to the Download Link.
- The Provided link will download a RAR file, extract it using WinRAR.
Step 2: Download Windows ISO File
- To Download Windows ISO file visit: @Getintopc.
- Make sure you download the correct version of Windows that you want to install.
How To Make a Bootable USB For Windows 11
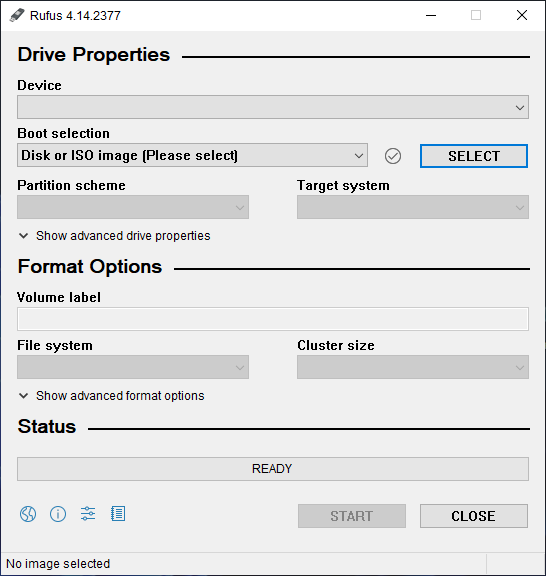
Step 1: Launch Rufus and Insert USB Drive
- Open Rufus “Run as Administrator“.
- Connect your USB flash drive to the computer.
- Make sure the USB drive has at least 8 GB of storage space.
- Rufus will automatically detect the connected USB device.
Step 2: Select the Windows ISO File
- Under the Boot Selection section, click the SELECT button.
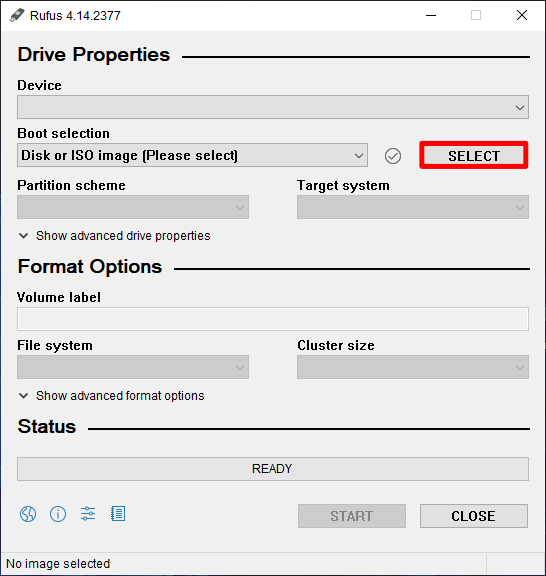
- Browse to the location where you saved the Windows ISO file and click Open.
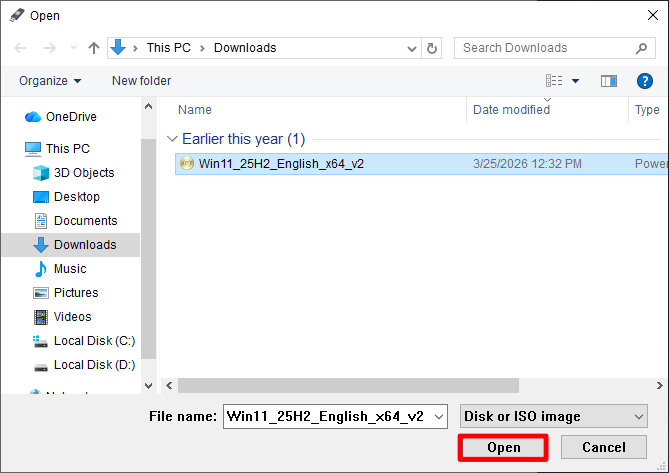
- Rufus will automatically load the ISO and configure the recommended settings.
Step 3: Select the USB Drive
- Under the Device section, choose the USB drive you want to make bootable.
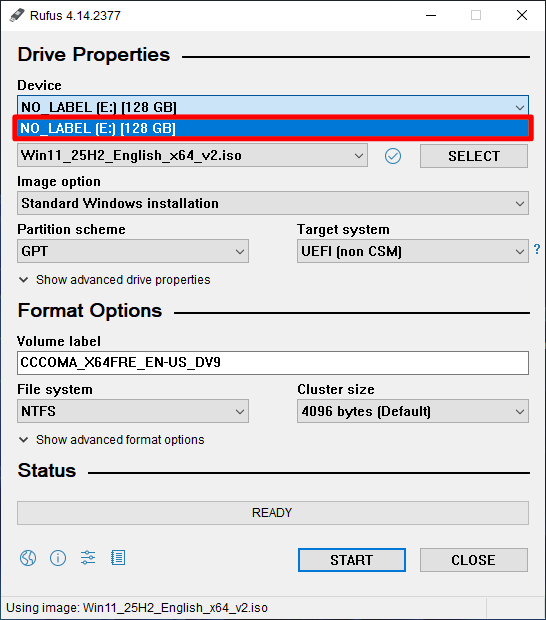
Note: If multiple USB devices are connected, carefully select the correct one because all data on the selected drive will be erased.
Step 4: Configure Partition Scheme and Target System
Choose the partition scheme according to your computer’s firmware:
For Modern PCs
- Partition Scheme: GPT
- Target System: UEFI (non-CSM)
For Older PCs
- Partition Scheme: MBR
- Target System: BIOS (or UEFI-CSM)
If you’re unsure which option to select, leave the default settings recommended by Rufus.
Warning: Selecting the wrong partition scheme may prevent your computer from booting from the USB drive.
Step 5: Start Creating the Bootable USB
After verifying all settings:
- Click the START button.
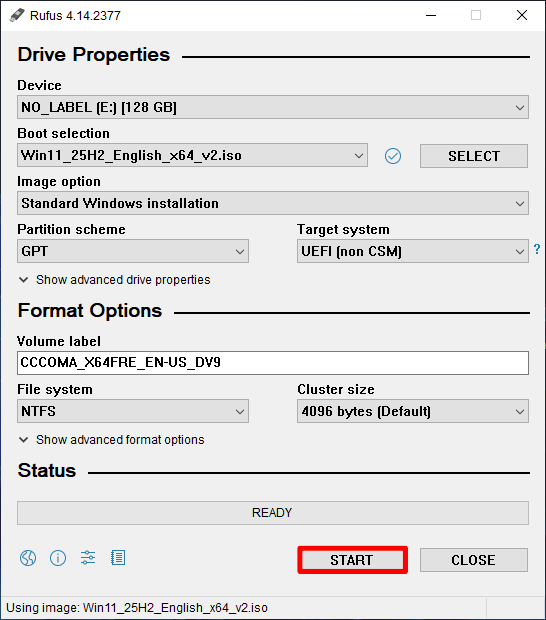
- If prompted, select the recommended write mode.
- Confirm that you want to erase all data on the USB drive.
Rufus will begin writing the Windows ISO to the USB drive.
Step 6: Wait for the Process to Complete
- The creation process usually takes between 5 and 10 minutes, depending on your USB drive speed and system performance.
- Once the status bar turns green and displays READY, your bootable USB drive is complete.
- Congratulations! Your Windows bootable USB drive is now ready to use.
You can safely close Rufus and eject the USB drive.
Tips for Ensuring Your Bootable USB Works
Following these tips improves the chances that the bootable USB will work correctly.
Use a Reliable and High Speed USB Drive
Always choose a high quality USB flash drive from a trusted brand such as USB 3.0 or USB 3.1 for faster data transfer speeds and better reliability. A good USB drive reduces the chances of errors during the bootable creation process and during Windows installation.
It is recommended to use at least a 16 GB USB drive especially for modern Windows ISO files as they are larger in size and may require additional space for proper extraction and setup.
Back Up Data Before Starting
Creating a bootable USB completely formats the drive, meaning all existing files, folders, photos, videos or documents will be permanently deleted.
Before starting the process make sure to carefully copy any important data to your computer, external storage or cloud storage. This step is essential because once the formatting begins the data cannot be recovered easily.
Verify the ISO File
Before writing the ISO file to your USB drive, ensure that the Windows ISO is complete, genuine and not corrupted. A damaged or incomplete ISO file can cause installation errors, freezing issues or failed boot attempts.
It is always recommended to download the ISO file from a trusted and official source to ensure stability and security. After downloading you can also compare file size or checksum (if available) to confirm its integrity.
Use the Correct Partition Scheme
Choosing the correct partition scheme is very important for successful booting. The partition scheme must match your computer’s firmware type.
- GPT (GUID Partition Table) is used for modern systems that support UEFI boot mode. It is faster, more secure and widely used in newer computers.
- MBR (Master Boot Record) is used for older systems that rely on Legacy BIOS mode. It is compatible with older hardware but has some limitations compared to GPT.
Selecting the wrong option may result in the USB not being detected during boot, so always double check your system type before proceeding.
Try Different USB Ports
If your computer does not recognize the bootable USB during startup the issue may be related to the USB port rather than the drive itself.
Try plugging the USB into a different port especially switching between USB 3.0 and USB 2.0 ports. In many older systems USB 2.0 ports offer better compatibility for booting compared to USB 3.0 ports which may not always be recognized during early boot stages.
Recreate the USB if Necessary
If your bootable USB drive does not work or fails to boot properly do not panic. Sometimes the issue can occur due to an interrupted write process, incorrect settings or even a faulty USB drive.
In such cases the best solution is to recreate the bootable USB using Rufus from the beginning. You can also try using a different USB drive or re downloading the ISO file to ensure there are no errors in the source files.
Alternative Tools To Make Bootable USB
Besides Rufus, several other tools can create bootable Windows USB drives.
PowerISO
PowerISO is a lightweight utility that can create bootable USB drives using Windows ISO files. It also includes additional features such as mounting ISO files, extracting archives, and burning CDs or DVDs. PowerISO is suitable for users who already use the software for disk image management and want an all-in-one solution.
If you want to download PowerISO, visit: @PowerISO
Windows Media Creation Tool
The Windows Media Creation Tool is Microsoft’s official utility for creating Windows installation media. It automatically downloads the latest Windows installation files and writes them to your USB drive. Unlike Rufus, it requires an internet connection and offers fewer customization options. You can only choose the Windows version and architecture (32-bit or 64-bit), while the tool handles the rest automatically.
If you want to download the Windows Media Creation Tool, visit: @Microsoft
Conclusion
Creating a bootable Windows USB drive with Rufus is quick, simple, and reliable. All you need to do is launch Rufus, select your Windows ISO file, choose your USB drive, and click the START button. The entire process usually takes only a few minutes, making Rufus one of the fastest and most user-friendly bootable USB creation tools available today.
Rufus is free, portable, lightweight, and works completely offline. It provides advanced options for both modern UEFI systems and older BIOS-based computers, making it suitable for almost every Windows installation scenario. If Rufus doesn’t meet your requirements, alternatives such as PowerISO and Microsoft’s Media Creation Tool are also excellent choices. For offline ISO based installations, Rufus remains one of the best options available.
Download Links
Note: Password for all files is thelearnerz.com
By clicking this button your download will start automatically, after the countdown. Please click only once and wait for the application to begin downloading.
Download